
| Remote App | Supported Model | Download Link | Requirement |
|---|---|---|---|
| The Roku App (Official) | Roku TV | Play Store App Store | Android 8.0 and above iOS 14.0 and later iPadOS 14.0 and higher |
Roku TVs support connecting external devices via HDMI, A/V, USB, and coaxial ports. If you attach a streaming device, console, or set-top box to the TV, use the Roku remote to go to settings and change the input. If the Roku remote is not working, use the TV button, a wireless keyboard or mouse, or the remote app to change the source. This article explains all the possible ways to change the input on Roku TV with or without a remote.
How to Change Input on Roku TV With Remote
If you have paired the Roku remote with your TV, follow these steps to change the source.
- Press the Home button on the Roku TV remote to view the home screen.
- Click on Settings and tap the Right arrow button on the remote.
- Select TV inputs and hit the Right arrow button.
- Choose each input and tap Set up Input.
- Once you have highlighted the input, click the Menu button and choose Rename.
- Lastly, rename the input of your preference and click OK.
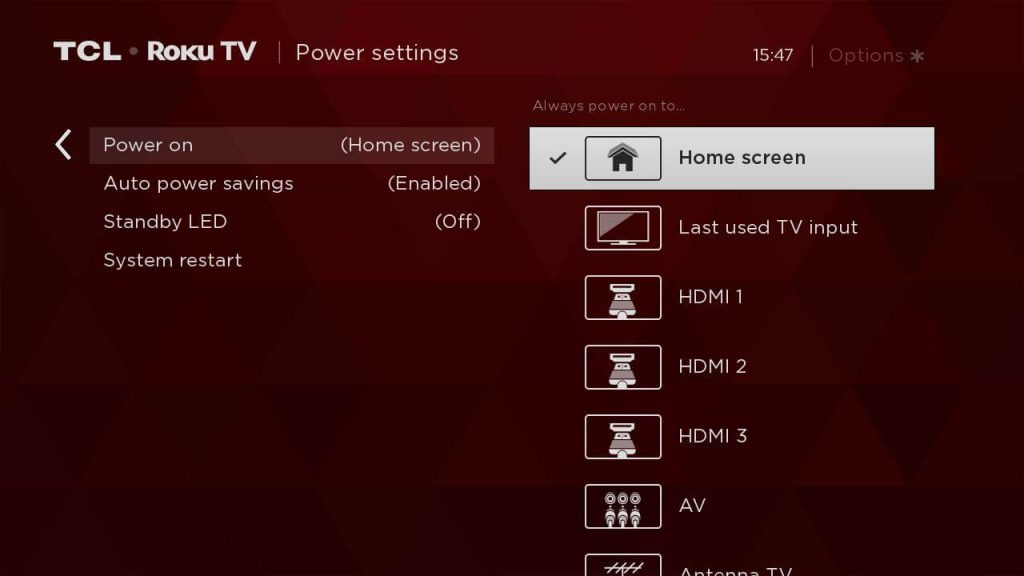
How to Set a Default Input on Roku TV
- Click the Home button on the Roku TV remote and then select Settings.
- Highlight the System option and tap OK.
- Further, choose Power and click OK.
- Select the Power on option and tap OK.
- From the list of inputs, select the default input for the TV when turned on.
- At last, press the Home button to confirm your choice.
How to Change Input on Roku TV Without Remote
In situations like the Roku remote found nowhere, you can use these tricks to change the input on your Roku TV.
Use the TV Button
All Roku TVs have a physical button located beneath the TV logo. You can use this button to turn the TV on/off, bring the home screen, and change the input source. Long press the physical button to turn on the Roku TV. Once turned on, short-press this button, and it will display a menu. Again, short-press the button until it highlights the desired HDMI source. Once highlighted, your Roku TV will automatically switch to that input.
Use a Wireless Keyboard
If you have a wireless keyboard with a touchpad, you can use it to change the Roku TV’s input. Plug the adapter of your keyboard into the TV’s USB port, and it is ready to use. Go to the home screen, use the touchpad to select the desired input, and tap on it. Your Roku TV will change to that HDMI source.
Use the IR Blaster Remote App
You can use IR-based remote apps to operate your Roku TV. Since these apps work using infrared signals, there is no need for internet connectivity. If your smartphone has an IR blaster, use these apps to change HDMI input on Roku TV without a remote.
| Remote App | Supported Models | Compatibility | Download Link |
|---|---|---|---|
| Roku Remote: RoSpikes (WiFi/IR) | Philips, TCL, Hisense, Sharp, Haier, Element, Insignia, Hitachi, RCA Roku TV | Android 4.1 and up | Play Store |
| Remote Control for TV – All TV | Roku TV | Android 5.0 and up | Play Store |
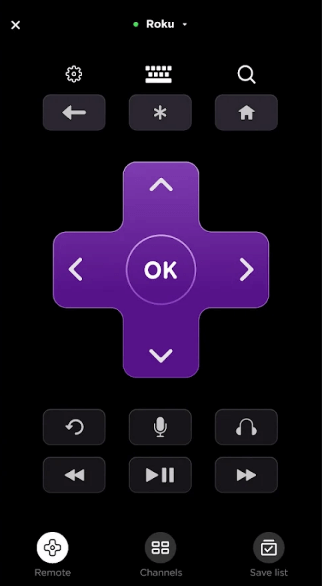
Use The Roku App
Before you continue with the steps, go to Settings and choose System. Further, select the Advanced system settings option. Then, choose Control by mobile apps. Further, change Network Access to Default.
- Connect your Roku TV to the same WIFI network as your smartphone.
- Install the Roku app on your device from Google Play or App Store.
- Open the Roku app and log in with your Roku account.
- Click on Devices at the bottom right and select your Roku TV.
- If prompted, enter the code displayed on the TV screen.
- Tap the Remote icon to get the remote interface on your smartphone.
- Now, change the source of the Roku TV from the home screen using the directional keys.
Buy a Universal Remote
If you don’t want to use remote apps, buy a universal remote. But you must program a universal remote using Roku TV remote codes. Further, you can switch the HDMI source on your Roku TV by navigating to the home screen.